
WHAT IS BLEND IF?
One of most overlooked features of Photoshop is the Advanced Blending options and the Blend If sliders. The Blend If sliders are located in the Layer Style dialog box - right click on any layer and select Blending Options. Blend If sliders can be used to either remove the information from the current layer selected This Layer - or bring up information from the Underlying Layer. The adjustments are similar to those of a Levels Adjustment Layer 0-255 (256 levels of information) from shadows to highlights

HOW DO I USE BLEND IF?
If you move the shadow marker (right) or highlight marker (left) you will partially remove or separate what information is to be used or affected in the adjustment. In the illustration below I have moved the shadow slider to a value of 42; meaning that the information between 0-42 levels can be seen. It is represented as an absolute value (showing defined pixel edges).


To create a smoother transition (gradient) of information, you can split the Blend If sliders. Press ALT or Option + Click on either side of the slider separate the marker. In the illustration below I split the shadow marker between values 42-62. This has feathered the transition only affecting those values.


HOW DO I USE BLEND IF TO TARGET SPECIFIC AREAS?
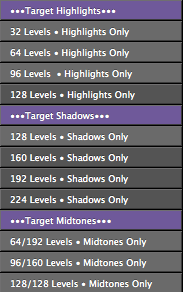
Targeting Highlights Only:

This Blend If split is now ignoring the Shadows and only targeting the adjustment to the Highlights and Midtones.
Targeting Shadows Only:

This Blend If split is now ignoring the both the Highlights and Shadows and only effecting the Midtones

This Blend If split is now ignoring the Highlights and only targeting the adjustment to the Shadows and Midtones.
Targeting Midtones Only:
FREE BLEND IF ACTION:
Here is an action set I have made for Blend If, it can be used on any layer or adjustment. I personally use it with a range of adjustments of Contrast or Sharpening as I can effect Highlights, Shadows or Midtones independently.